

Introduction
Yesterday I saw this fantastic illustration with curved text in PowerPoint that really impressed all the stakeholders in the (digital) conference room. Like an infographic, and instead of doing horizontal or vertical text, they have made the text curved, which saved a lot of space, but it looks good! I decided to learn this technique immediately, and in this article, you will learn to curve text in PowerPoint as well.
How to curve text in PowerPoint? The easiest and fastest method is to use WordArt to transform a text and curve or bend the text in PowerPoint. You can curve the text around a shape or make a circle text. Follow the five steps below to curve a text in PowerPoint:
- Navigate to Insert and select WordArt.
- Pick the WordArt style you like.
- Type your text in the designated area.
- Go to Shape Format, Text Effects, Transform.
- Pick the Curve effect style.
The above process to quickly curve text in PowerPoint is great to have in your PowerPoint skills toolbox. However, there is so much more fun stuff you can use the curve text tool for.
In this article, we will show you several great application areas for the curve text tool in PowerPoint. Just keep on reading.
Method 1: Curve Text in PowerPoint Using WordArt
This is the first method used to curve text in PowerPoint and is also the most straightforward method. In short, we will create a curved text by inserting a WordArt in PowerPoint. Just follow the steps below, and you will learn how to make a curved or bent text easily.
1. Navigate to the Insert section.
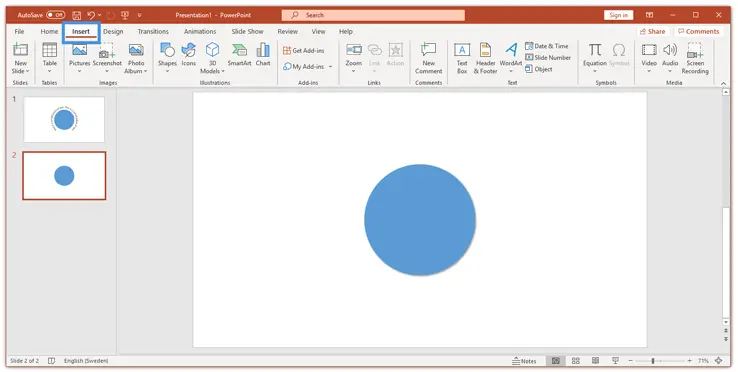
2. Click WordArt in the Text group section.
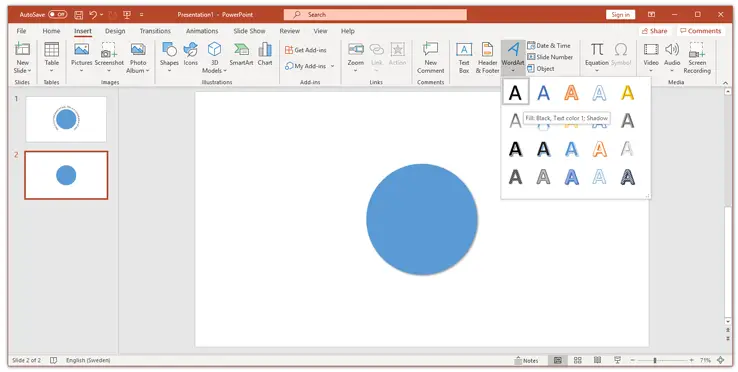
3. Select the text style you want to use in your presentation
4. Now, select all the text that was inserted and enter your own text
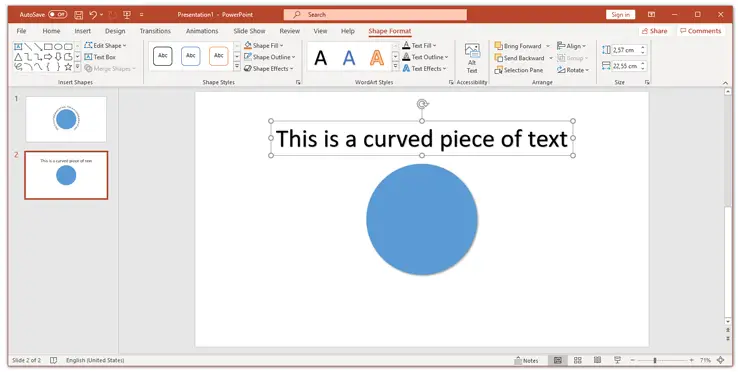
5. Navigate to the top ribbon, and choose Format Shape
6. Click the Text Effects drop-down menu, and select Transform

7. Select the desired design style from the Follow Path section
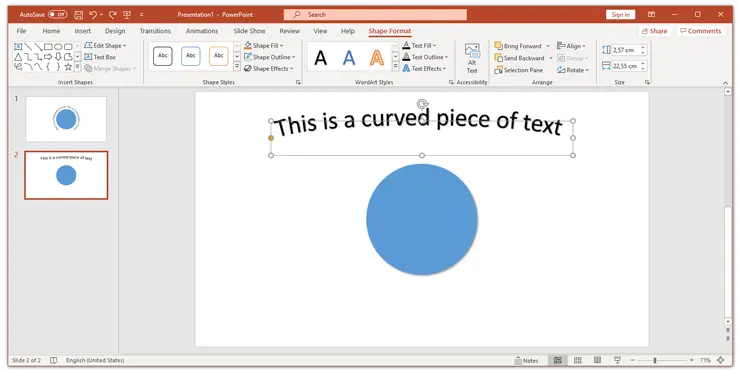
Now you have easily created curved text in PowerPoint. You will probably notice that the text does not have exactly the curve you want. You can fix this by editing the text box. If you click on your curved text, several control handles will appear, which will allow you to edit your curved text.
Do you not like the format of your curved text? Using this method to insert bent text with WordArt can be very suitable for headings. However, if you want a little more subtle curved text, you can use the next method.
Method 2: Curve Text in PowerPoint Using Text Effects
This method is very similar to the previous one, but here we will not use WordArt. Instead, we will insert a text box and apply Text Effect to it to curve the text. To curve text in PowerPoint using text effect, follow these steps:
- To insert a new text box, click Insert in the top ribbon, then click the text box.
- Place your text box where you want your curved text, and then type your text.
- Then select your text box, and click Shape Format, then Text Effects.
- Then click on Transform and Follow Path.
Now your text is curved. This method is very similar to the one we described earlier, but the difference is that we did not use WordArt text. We showed how to curve regular text in PowerPoint. Now let’s talk a little bit about how you can change the path of the curved text.
Method 3: Curve Text in PowerPoint Using Alter Text Path
Now you know how to curve text in PowerPoint, but what do you do if you are not happy with the curve? It’s easy to change your curved text’s design, but it takes a bit of technique to make it look good.

Once your curved or bent text is created, you can adjust the inflection by adjusting the shape. You do this by selecting your curved text and adjusting the appearance through the handles.
With the centered white dot at the bottom of your text box, you can make the text more curved by clicking on it and dragging it down. You can also hold and drag the white dots to the right or left and drag them closer together. Then you will get a more curved text.
Furthermore, you can also use the yellow dot to adjust the curve. To do this, click on it, hold down the mouse button, and then adjust the point in different directions. With this method, you can make your text more or less curved in PowerPoint.
How to Make Circle Text
So far, I have shown how to curve text in PowerPoint, but how to make circle text, you may be wondering? If you can curve text, you can also make circle text.
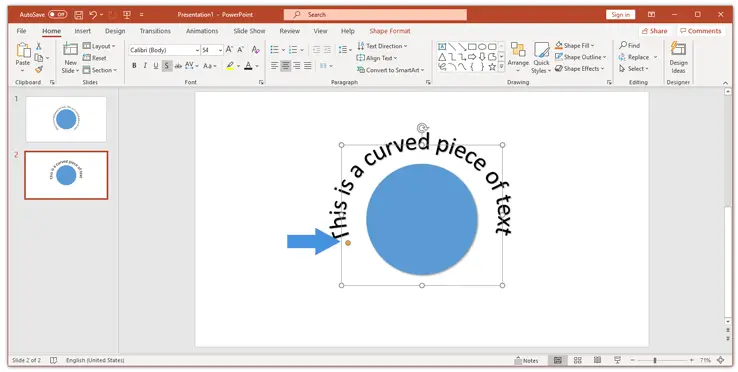
The first thing you need to think about when making a circle text is that your text contains enough characters to be able to form a complete circle. Once you have ensured that you have a longer text, you can use the same method as I described above, i.e., curve a text in using an alter text path.
You have selected the text you want to form a circle and drag the yellow dot down until you see the text form a circle. That’s all; it’s not more difficult than to make a circle text in PowerPoint. As you can see, this is basically the same method that you learned when you learned how to curve text in PowerPoint.
Pro Tip! Another fun way to display text in a more playful way is to make a word cloud. In this tutorial, we will guide you, step-by-step, on how to make a word cloud in PowerPoint.
Curve Text Using a Curve Text Editor Online
If you do not have PowerPoint or want to try another way of curving text in PowerPoint, you can use a curve text editor online. There are various curve text editors online, and I recommend just google “curve text online” and test yourself.
You can use a service such as mockofun to create curved text online. However, I recommend using the methods of how to curve text in PowerPoint that I have described above. These methods give you full control, and it is easier to do your curved text directly in PowerPoint instead of using third-party products.
How to Convert Curved Text to PNG
A good way to reuse your curved text is to create a transparent background and save it as a png file. But, how to convert curved text to png, you might be wondering? There are certainly many methods to save the curved text as a png file. I always use Adobe Photoshop for this.
I do not know how to save the curved text as a png in PowerPoint; you are welcome to contact me if you know. Do you have a curved text that you want as a png file with a transparent background? If you do not succeed in finding a good method by googling “curved text png,” go to Contact Us and write a message to us entitled “Curved Text in Png,” and we can make a curved png text for you completely free.
Conclusion
How to curve a text in PowerPoint? In this article, we have answered that question clearly and also given you some additional related knowledge. If you just came here for the answer to the question of how to curve a text in PowerPoint – here you go:
- Navigate to Insert and select WordArt.
- Pick the WordArt style you like.
- Type your text in the designated area.
- Go to Shape Format, Text Effects, Transform.
- Pick the Curve effect style.
Indeed it was easy to create a curved text in PowerPoint? This is a very useful technique that you will use a lot once you have learned to use it properly. If you want help with bending a text in PowerPoint or something else that has to do with PowerPoint, you are welcome to send us a message to talk more.
Have you seen any great examples of curved texts in PowerPoint? Let me know by posting a comment below.
Happy PowerPointing!
